Tag Archives: vertex IN180
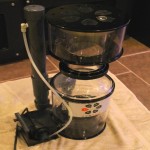
Vertex IN180 in Sump Skimmer Product Review
Rating Overview:
Overall product rating of: 4 out of 5
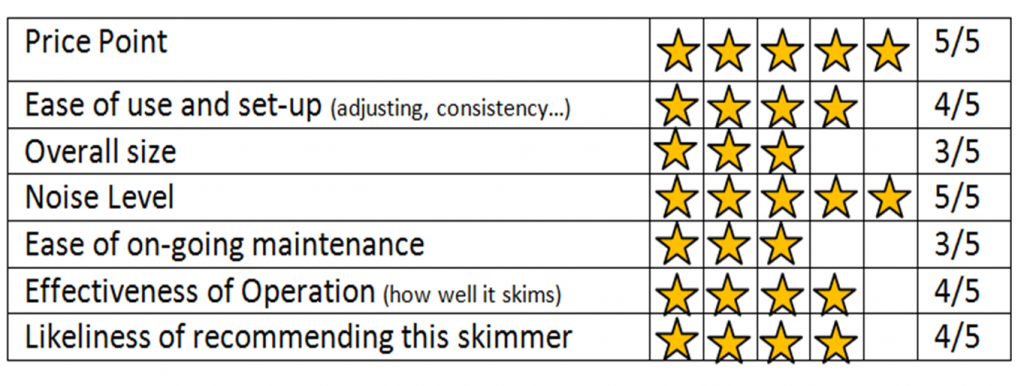
Details of my ratings along with the manufacture’s specifications are contained below.
The below is taken directly from the manufacture’s website:
http://www.vertexaquaristik.com/Products/ProteinSkimmers/InternalSkimmers/INSeries/IN180/tabid/148/language/en-US/Default.aspx
Amongst the many progresses in Marine Aquaria, the use of Protein Skimmers was, by far, one of the greatest milestones. Since their inception, there has been much advancement in the design and functionality of Protein Skimming. The Vertex™ IN-Series utilize these technologies to their greatest effect while offering you the best value for your investment.
Superior Performance
Powerful motor pumps drive precision Needle Wheel Rotors to introduce large amounts of air and water into the skimmer body. This is done without compromising continuous delivery and velocity due to the turbulence reducing bubble plate chamber. The result is a consistent foam head and nutrient extraction.
Silent
Vertex™ IN-Series Skimmers represent the Ultimate solution to noise reduction. Rotors engineered with the incredible strength of Rare Earth Phosphor Magnets and the frictionless ride of ceramic shafts, polished to an exceptionally high gloss, ensure that the entire impeller assembly spins with amazingly nominal resistance and vibration.
Easy
Removal of the collection cup has never been as effortless. Messy union locks and twist caps used by other competing products have been replaced by a Slip-Lock seal; minimalism simplifying your routine.
Plug and Play
Every Vertex™ IN-Series Skimmers is packaged ready-in-box for immediate use in your system.
Exclusive Features
- Quality cast-acrylic construction for long life.
- Advanced pin-wheel design for maximum performance.
- Effective conical reaction chamber.
- Turbulence reducing bubble plate sits low in skimmer body, increase reaction chamber volume.
- Easy to use Slip-Lock neck connection.
- Hassle-free, built in skimmate drain.
- Advanced air-silencer draws only moist air to keep the venturi clog free.
- Effortless adjustment; truly set and forget.
Technical Data
- Footprint 14″ x 10½”
- Height 24½”
- Diameter 8″
- 720 lph @ 32W
- Rated up to 180gal
The below is my own assessment of this skimmer after using it on a few different set-up over the past few years.
Price Point:
This is a very reasonably priced skimmer. You can typically find these skimmers brand new ranging anywhere between $200.00 and $300.00 throughout Canada and the USA. Certainly worth the money you will pay for this skimmer. Repair parts also seem very common to find and well priced, however, I have never needed to purchase any.
Ease of Use and Set-up
The Vertex IN180 skimmer was one of the easiest skimmers to set-up that I have used. Both of the Vertex IN180s that I have bought took about 4 to 8 days to break in before the skimmer started to work as it should pulling lots of gunk out of the water. There are no screws, bolts, nuts, or tools of any kind required to set it up with easy to follow instructions. Certainly a great “plug-and-play” design. Adjusting the air mixture is also very easy to do as you just need to turn the air intake pipe until you have the correct mixture for your set-up.
What I personally do not like is that this skimmer can require slight adjusting over time. I typically need to adjust it every 2 months or so which is not a very big deal. After completing a very detailed cleaning of the skimmer you will need to complete a few extra adjustments for the first 3 or 4 days until the skimmer is working well again. While this can be very common for most skimmers, I feel the Vertex IN180 is a little bit more sensitive to changes in the water as compared to other skimmers that are of comparable quality and value to the vertex.
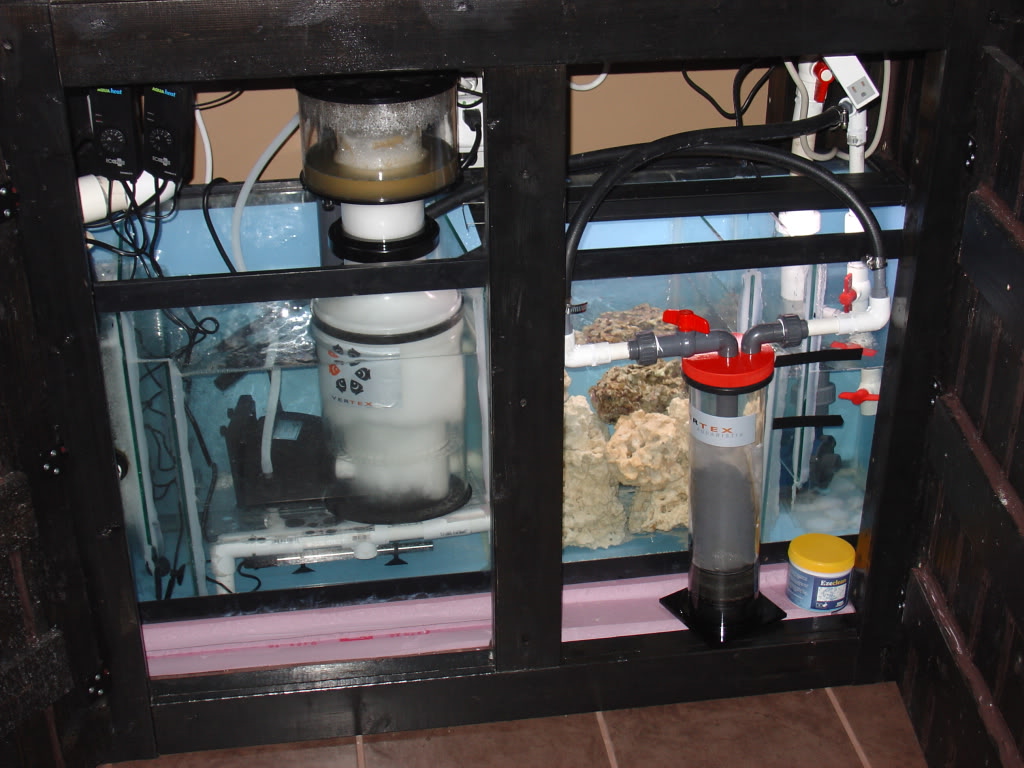
There are some pictures at the end of this product review that show more details of how easy it is to put this skimmer together. The below picture is the first Vertex IN180 that I had purchased and was taken about 3 days after having it running in the sump.
Overall Size
This is the biggest negative aspect (in my opinion) of the Vertex IN180. It is taller than most comparable skimmers. As the Vertex IN180 is designed to have the pump on the outside of the skimmer body, it does have a larger foot print as compared to some other skimmers.
Noise Level
This is a very positive aspect of the Vertex IN180 skimmer. It is a very quite skimmer. When placed in a sump that is in an aquarium stand, you will only hear a very slight and low humming noise. The 120 gallon aquarium that I am currently using a Vertex IN180 on is right beside the couch in our living room. I can’t even hear the skimmer running when sitting on the couch watching the TV which is across the room from both the couch and the aquarium.
Ease of on-going Maintenance
As the Vertex IN180 has a very good plug-and-play design, it can be easily taken apart for a good cleaning and routine maintenance. There are two aspects of routine maintenance that I do not like. The first slip-lock skimmer cup / skimmer neck connection. The cup sits very tightly in the neck I personally do not like. While this helps to ensure effective performance, it can also make the skimmer cup a little difficult to remove. However, the larger sized skimmer cup does help to reduce the number of times you need to remove and empty/clean the cup. The second aspect that I do not like is that it is difficult to clean the bubble plate and inside of the bottom half of the body as the skimmer body is not designed to come apart.
I like to have my skimmers set to pull a thick skimmate out of the water. When using that approach, I have found that I need to empty and clean the skimmer once every 7 to 10 days and perform a very detailed cleaning of the rest of the skimmer once every 4 to 5 months.
Effectiveness of Operation
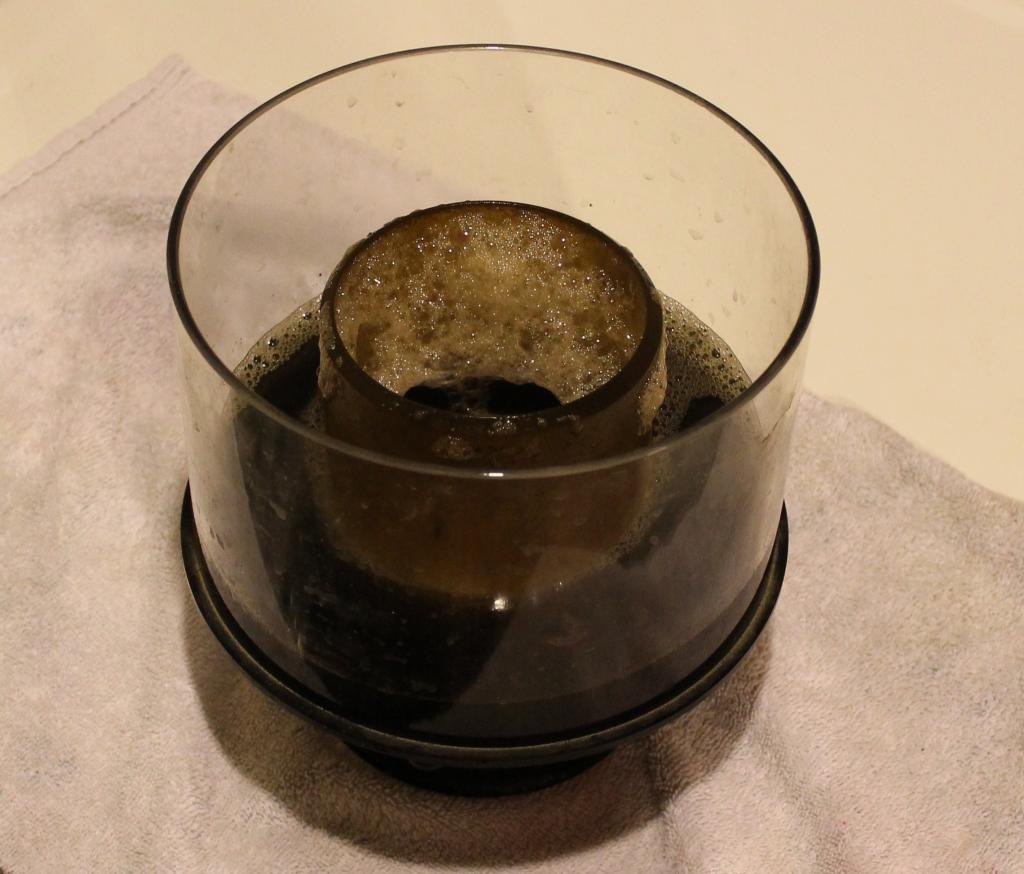
The Needle Wheel Rotor design that Vertex has developed in the IN180 skimmer seems to be very effective producing a very fine and thick layer of bubbles once the air intake is adjusted correctly. This skimmer has continued to work great for me over the past few years. Once I had it broken in and adjusted correctly, it started taking a lot of crud out of the water and it did not put micro bubbles into the water either. After a few years of use, it is still working well. In all three of the set-ups that I have used this skimmer on, it had proven it’s self to be a very critical part to the aquariums overall filtration. If you maintain this skimmer when required and keep it adjusted correctly, it will also provide you with years of very good performance. The below is after 2 or 3 days of use on a moderatly stocked 120 gallon set-up
Likeliness of Recommending this Skimmer to Others
In short, very strong likeliness of me is continuing to recommend this skimmer to others. This would be one of the true ways to really assess how well this skimmer preformed for anyone. I have used two different Vertex IN180 skimmers over the past few years. One in a 90 gallon SPS aquarium with a 55 gallon sump, and a second in a 120 gallon mixed reef tank with a 55 gallon sump, which was later taken down and converted to a FOWLR set-up. In all three situations this skimmer preformed well overall. I would recommend this skimmer for lightly stocked reef or FOWLR aquariums up to 130 gallons in size (combined display tank and sump water volume) or moderately to heavy stocked aquariums up to 110 gallons (combined display tank and sump water volume). The only time I may not recommend this skimmer for aquariums like this would be if there was any potential size limitations of the skimmer compartment in the sump or the internal height of the tank stand if going under the tank.
Some additional Information
As I never did think to take any pictures when I purchased this skimmer new, I thought I would take a few pictures after I completed a very detailed cleaning of my Vertex IN180 skimmer. The needle wheel is easily removed by unlocking the cover plate a pulling out the shaft. No tools required. This makes routine pump cleanings very easy. When you buy a Vertex IN180 skimmer, the pump is assembled with the needle wheel already in place.
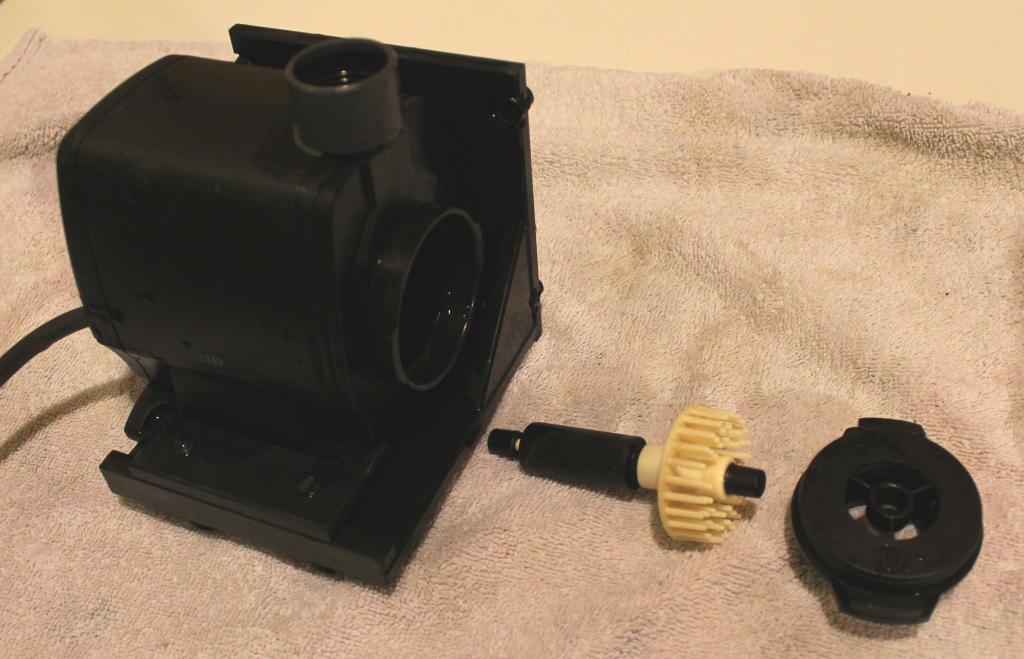
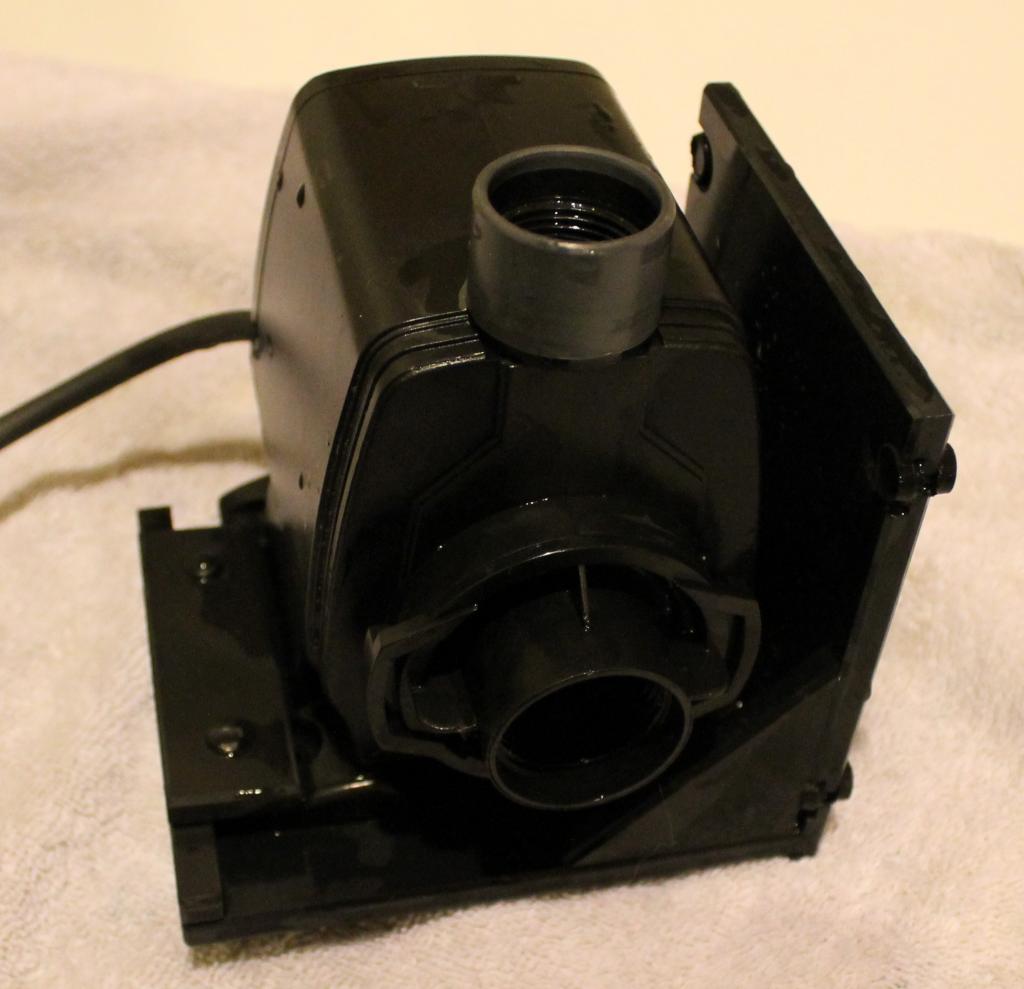
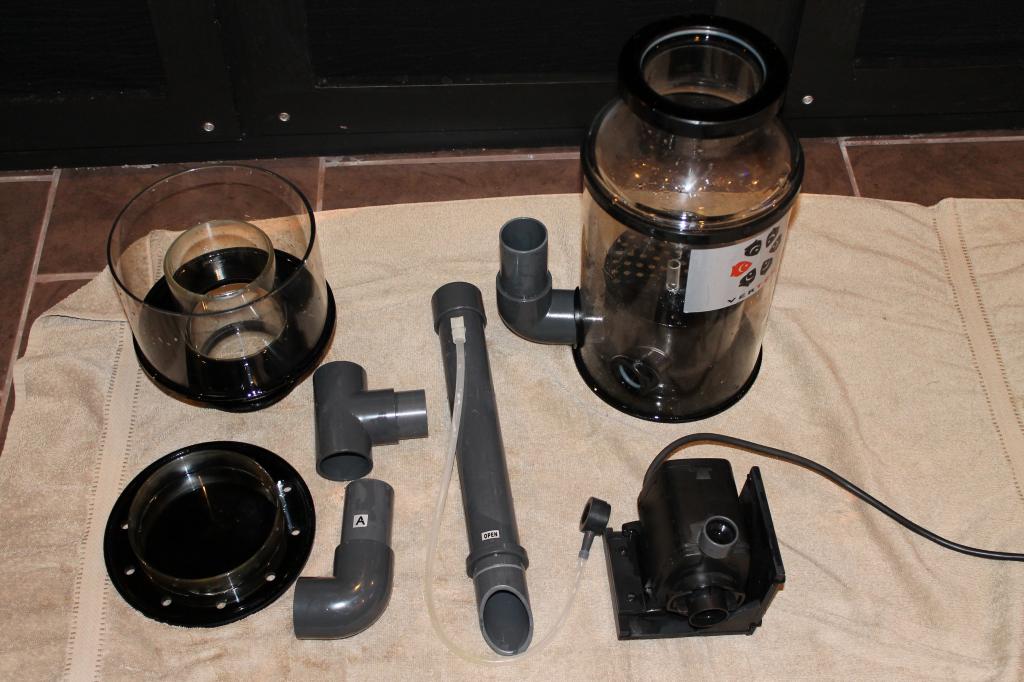
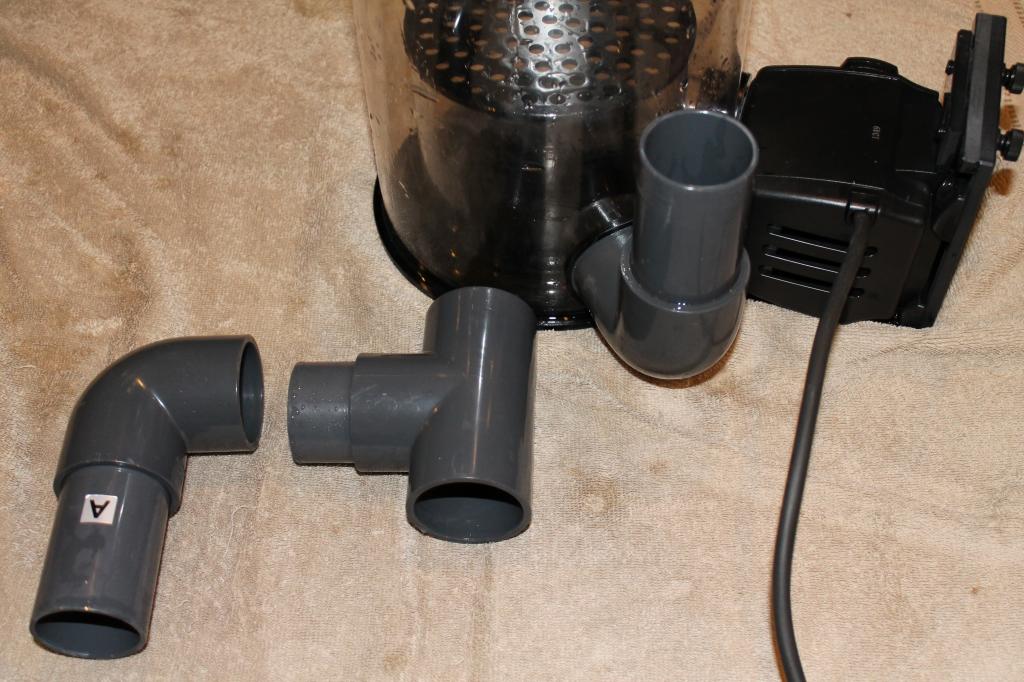
Below is what you will get out of the box when you buy a Vertx IN180. This is a picture of my skimmer taken apart after a detailed cleaning
To assemble you have to first mount the pump to the pump mounting bracket so it will sit flat when place on the skimmer body. The “L” shapped skimmer bracket is already on my pump pictured below.
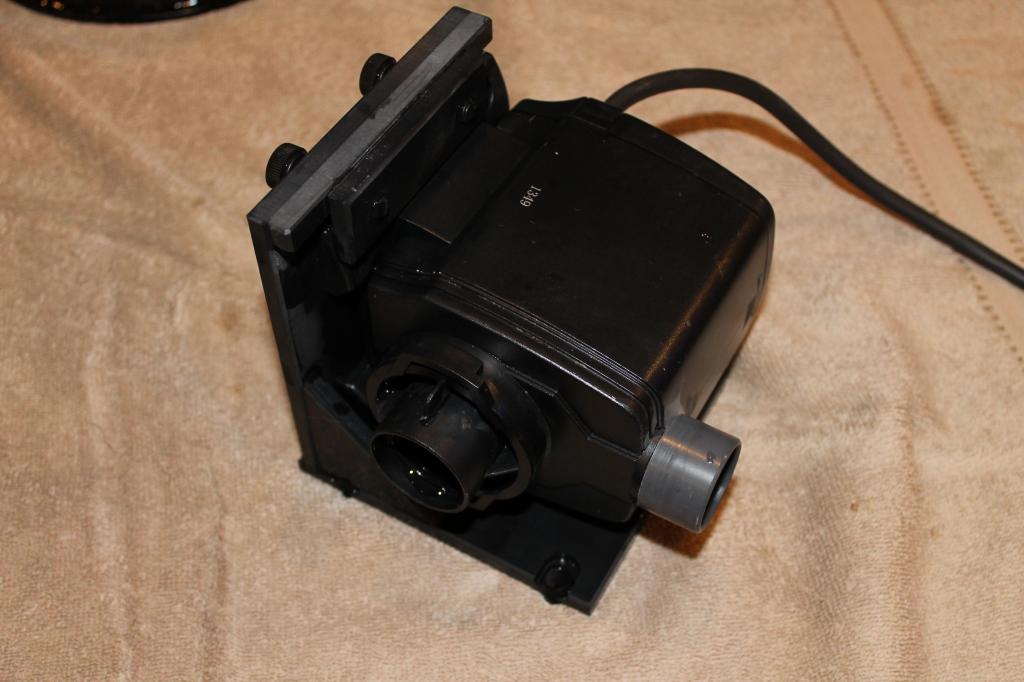
Next to push the pump output nozzel into the pump port on the skimmer body
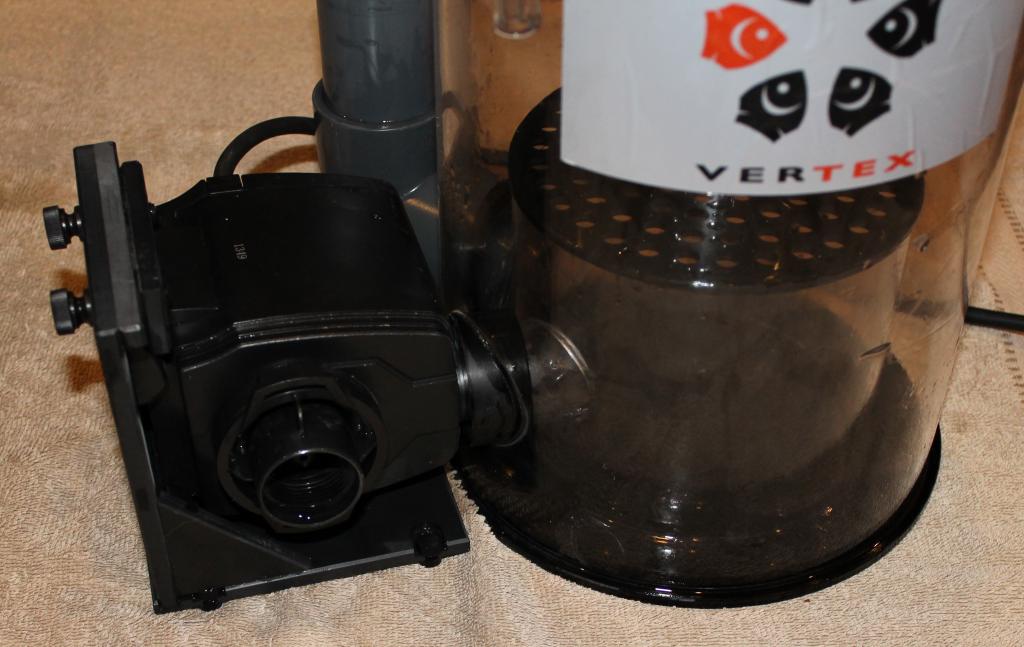
Assemble the simmer out-put assemble and connect the airline port and the venturi attachement to the pump
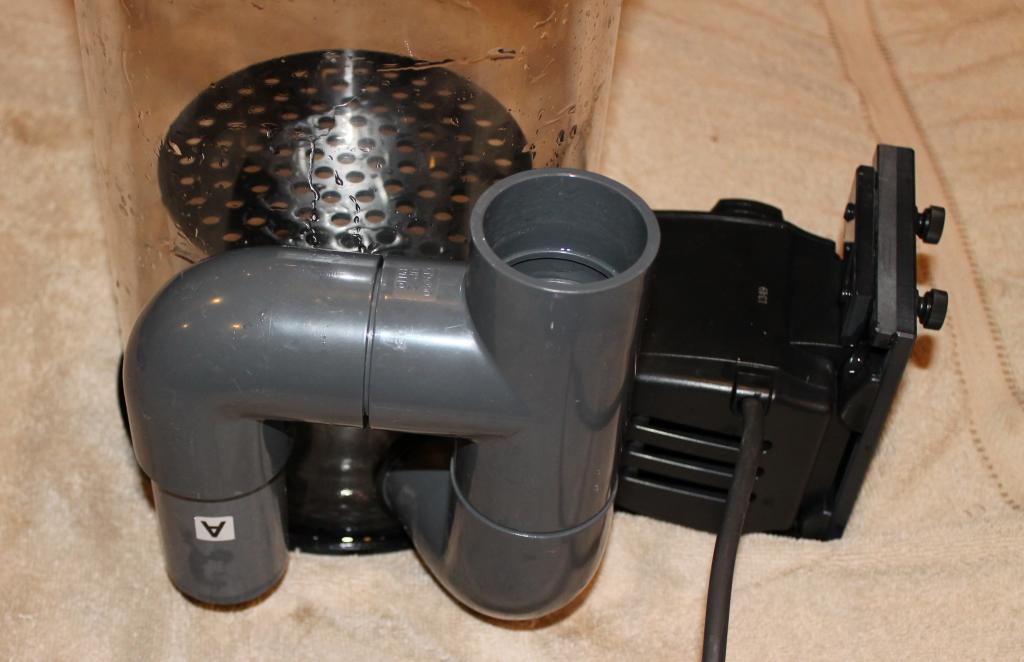
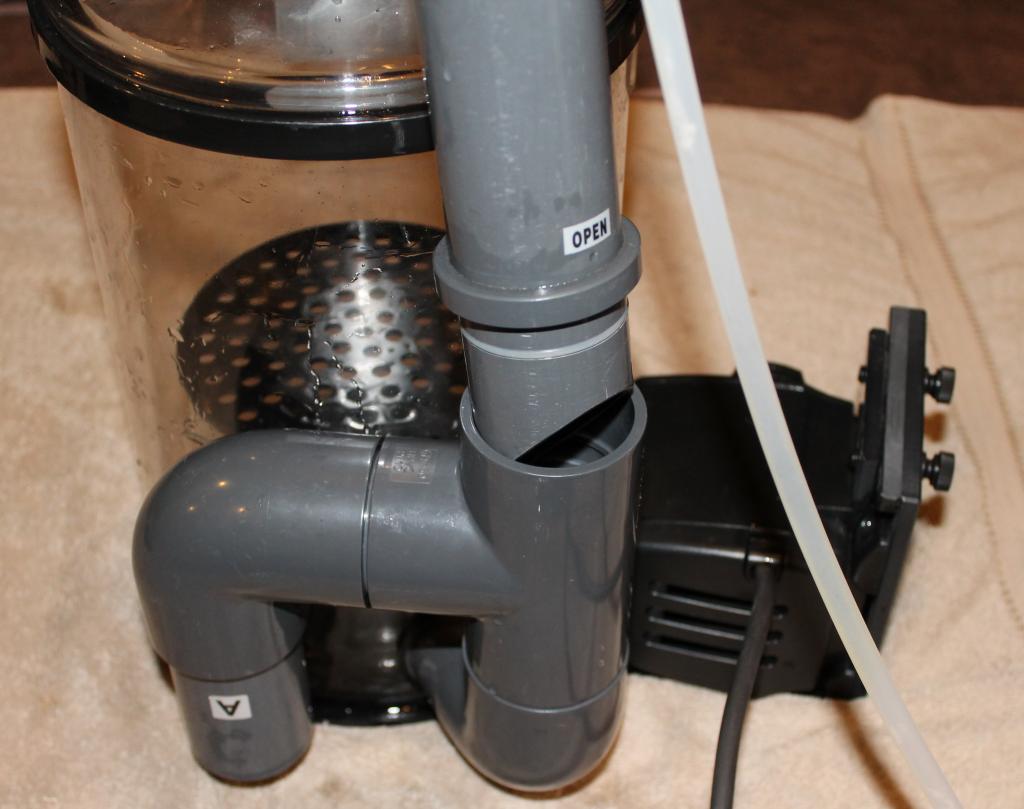
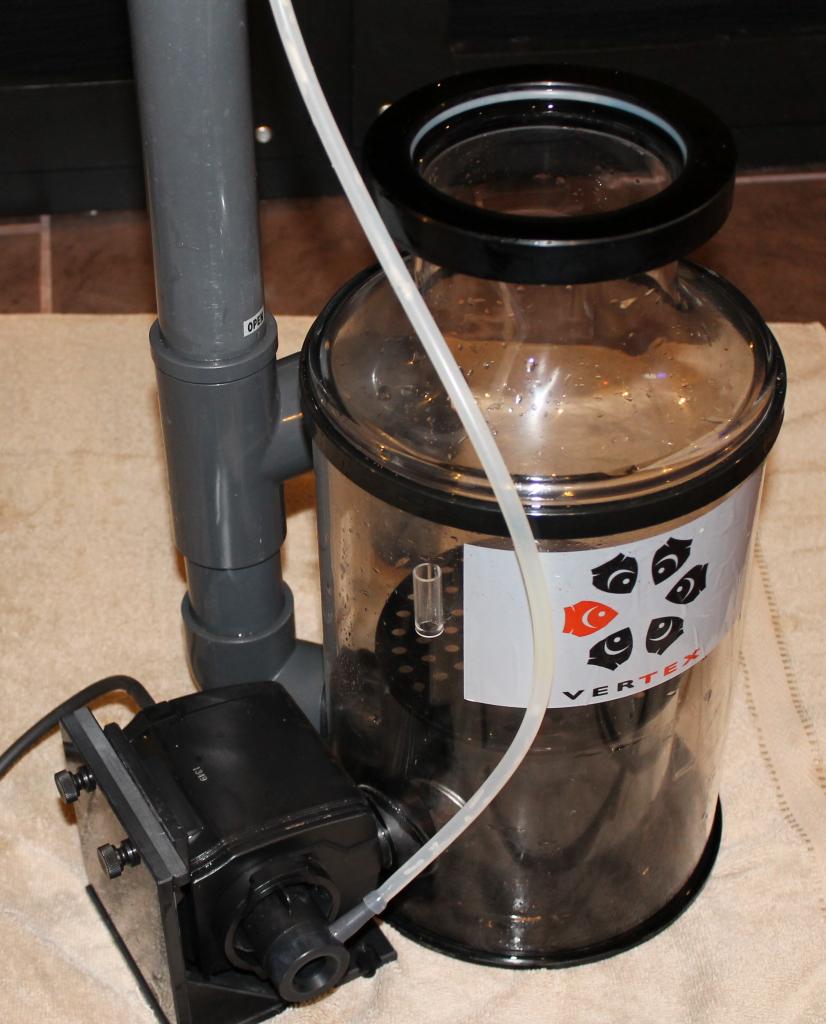
And finally the cup and lid
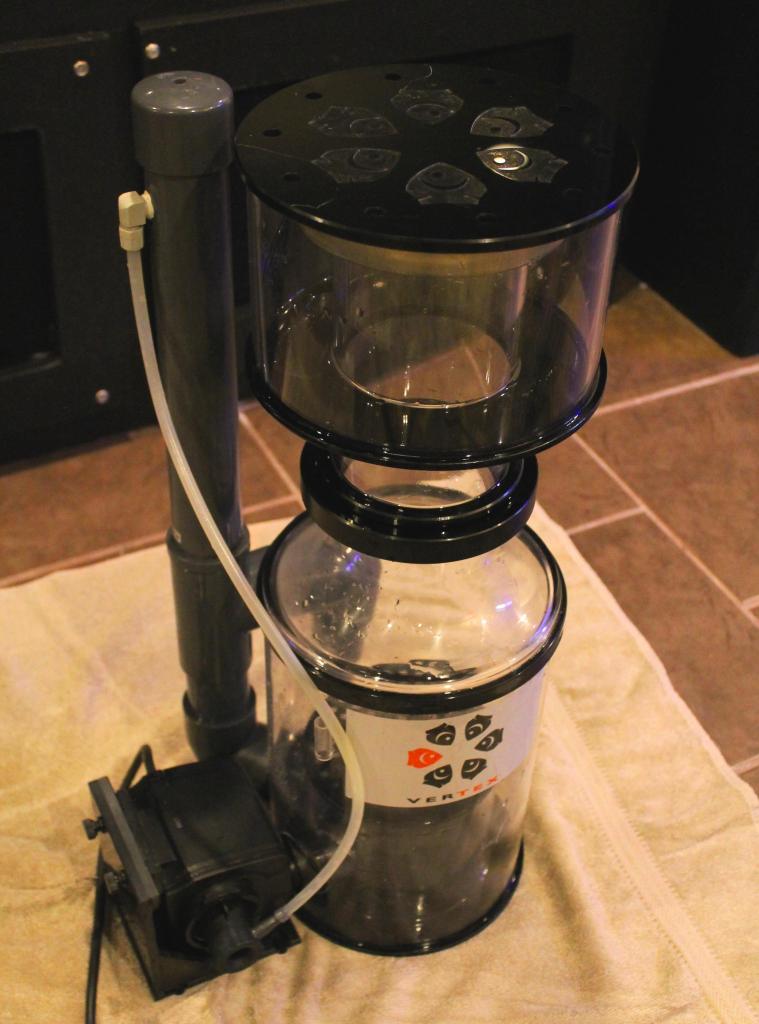
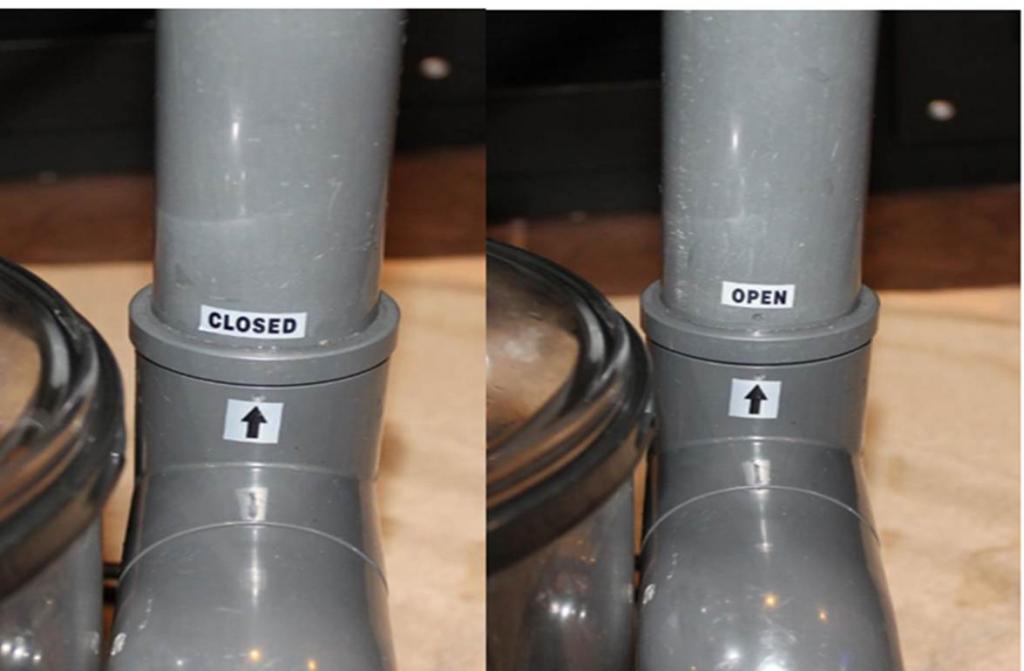
On-going adjustments are easily done by turning the upper part of the skimmer output which will either restrict or increase the flow of water out of the skimmer body which will affect/adjust the production of foam inside the skimmer.
When picking out a skimmer for your set-up, I would refer you to the below article which may help you select the correct skimmer for your aquarium
https://www.reefaquarium.com/2013/selecting-a-new-skimmer/