Curing Rock for Marine Aquariums
“Curing” is a common term used to describe a process followed to prepare marine rock for use in an aquarium. This is one topic I spent a lot of time researching before setting up my first marine aquarium. I did not appreciate the benefits of curing marine rock until going through the process first hand on a few different occasions and seeing the results. The below is a few of the things that I learned.
Please keep in mind that as with most aspects of this hobby, there are always different methods to get and maintain a healthy salt water tank. I will only be sharing some of those ways that I prefer.
But first, let me clarify some of the terminology. The term “rock” is used to describe formations of rock like structures found in the ocean. These rock formations are created when corals grow and then die off, leaving their calcified skeletons. New coral growth develops on top of these structures, and so on, continuing the cycle. Other various forms of marine life will also call these rock structures home along with the beneficial bacteria that are needed to keep the water safe and clean. This is what we commonly refer to as live rock. If, at some point, (and for many different reasons) all the corals and other life forms living on the rock die, the rock structure is said to become dead. Once this dead rock is collected from the ocean, it is typically referred to as dry rock (and sometimes base rock or dead rock). Some large deposits of dry rock have even been found inland were coral reefs used to exist hundreds of thousands of years ago, and are mined today for use in the hobby.
Picking out Good Quality Rock
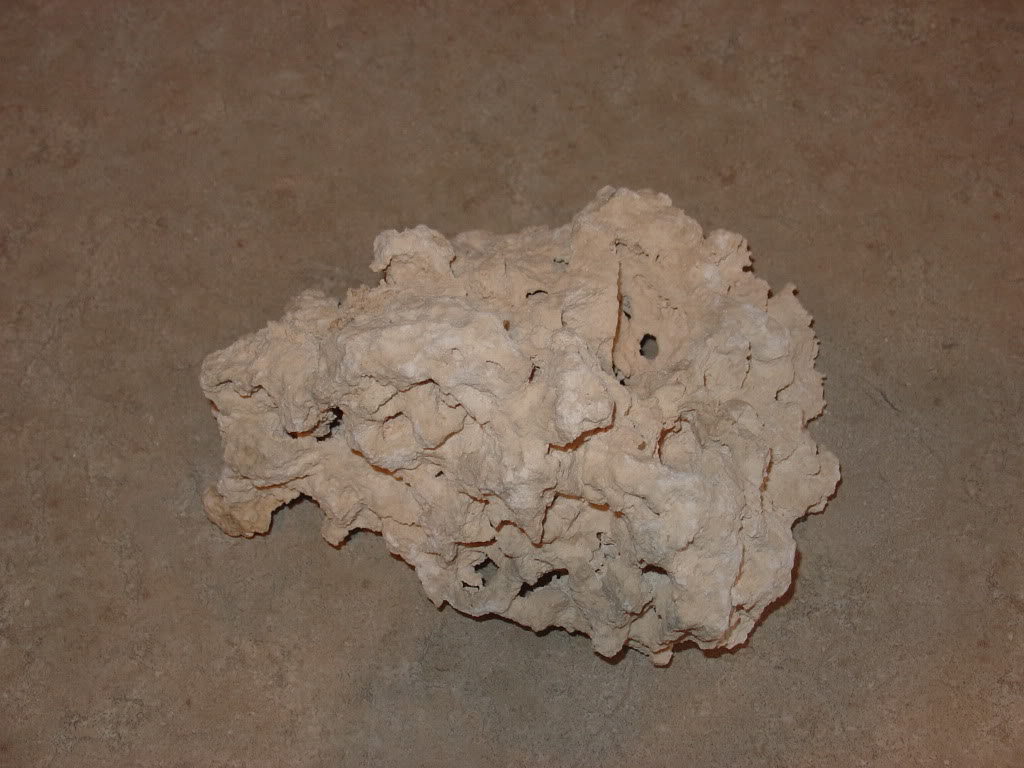
I thought it might be best to include a little informational and examples of what to look for when getting the best quality rock you can find. As your rock will become live and provide the biological filtration for your aquarium, you want to get the best quality rock available to you. When picking out dry rock, look for rock that is very porous, almost looking like there is holes part way through it. The more porous it is the better filtration it will provide. Also, look for a uniform almost off- white color. A little discoloration from that is OK. The lighter colors typically indicate the rock was well cleaned before drying out. I have found some great quality rock removed from inland sea-beds, Fiji premium rock, Tonga rock, and Vanuatu rock.
The below pictures are examples of good quality dry rock.
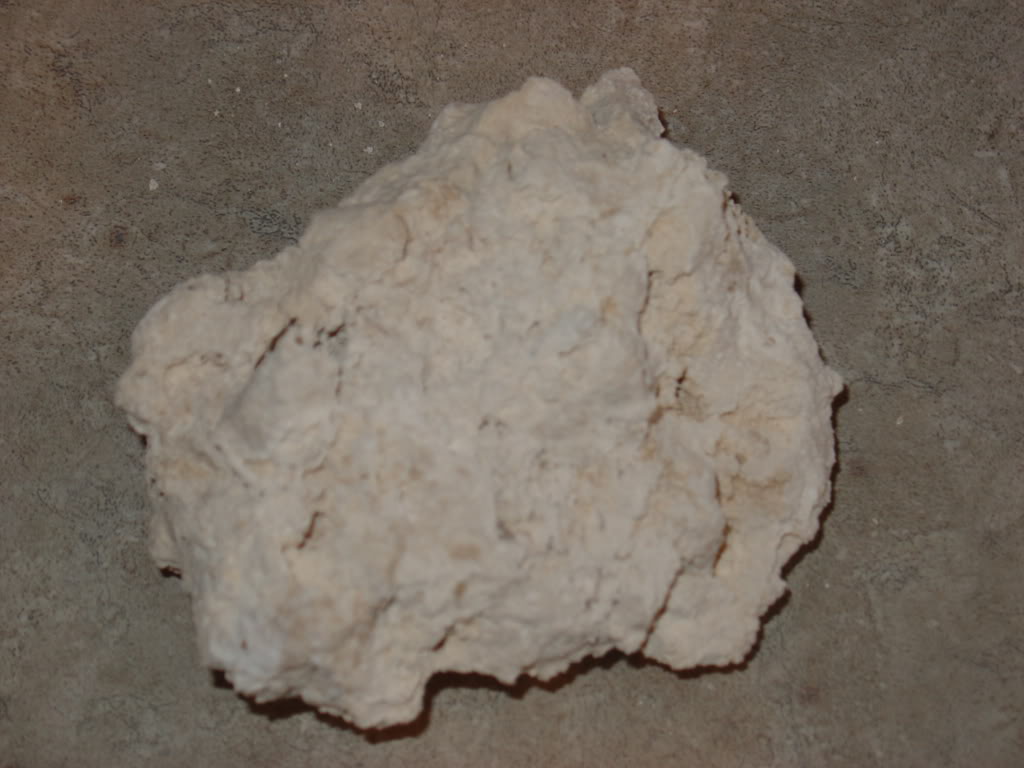
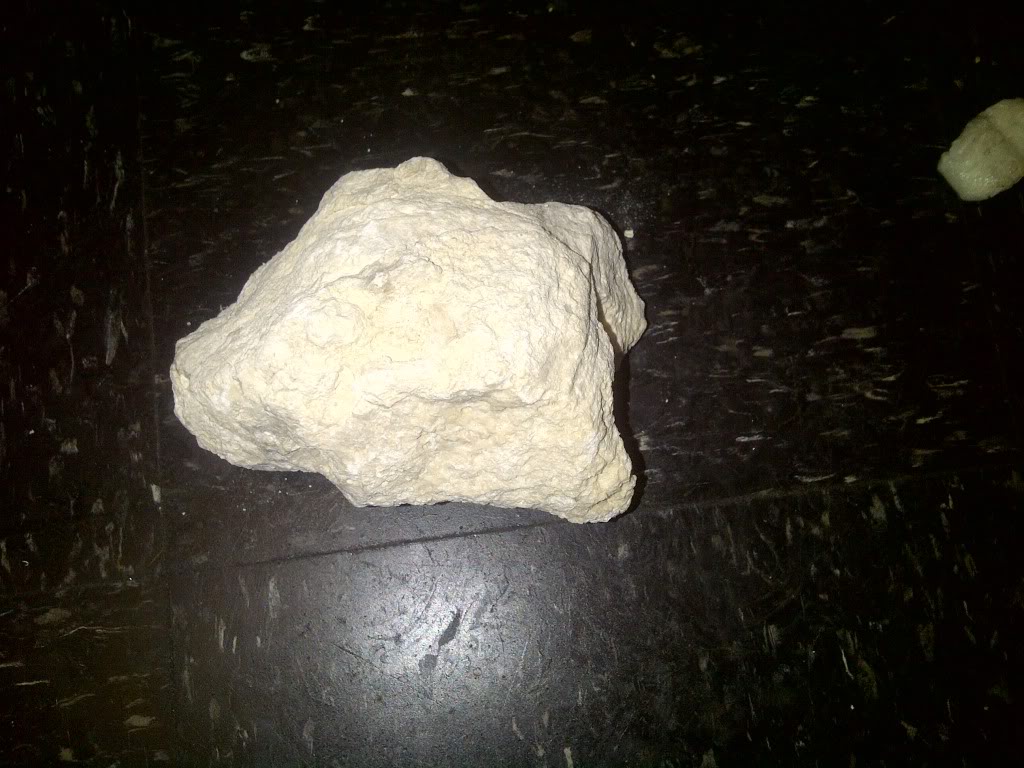
Below are examples of dry rock to avoid, or use as base rock when stacking rock in your aquarium. Keep in mind there is nothing wrong with the rocks in these below pics. They, too, will become live rock; they just won’t be able to hold as such beneficial bacteria as more porous rock can.
How to Pick-out Good Quality Live Rock.
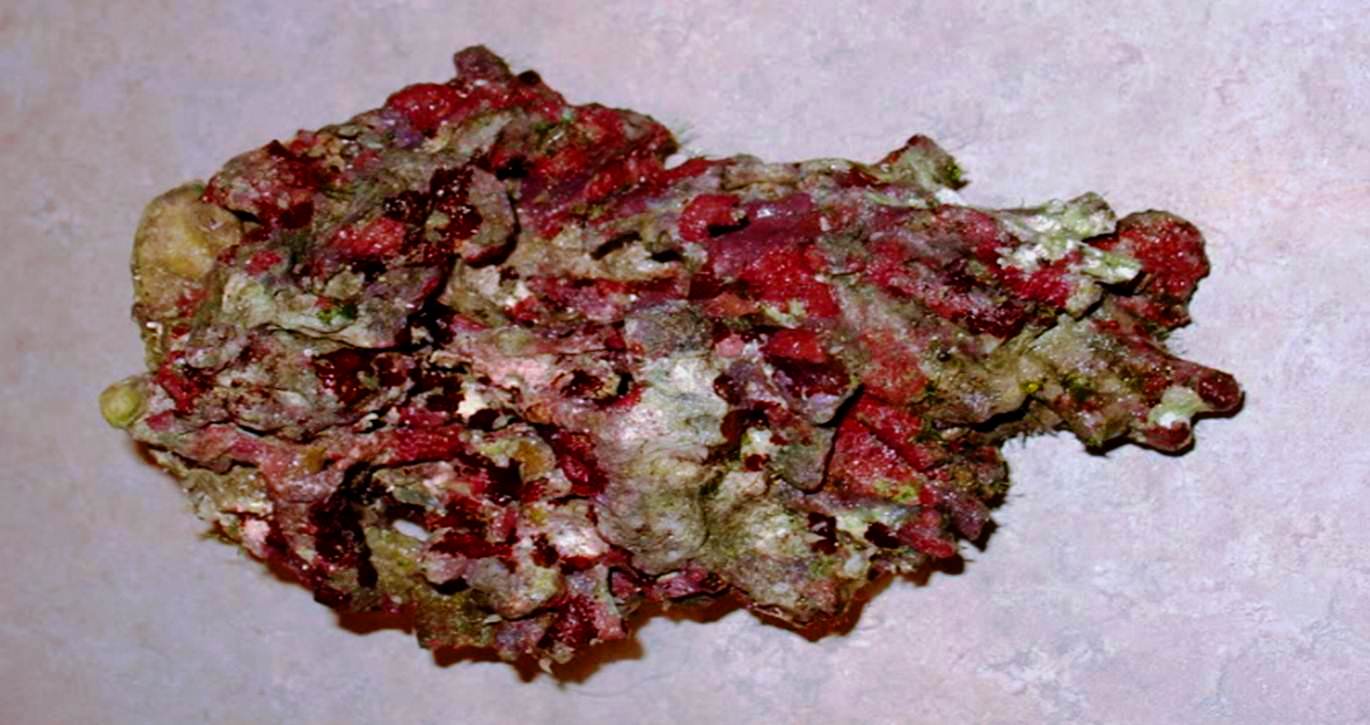
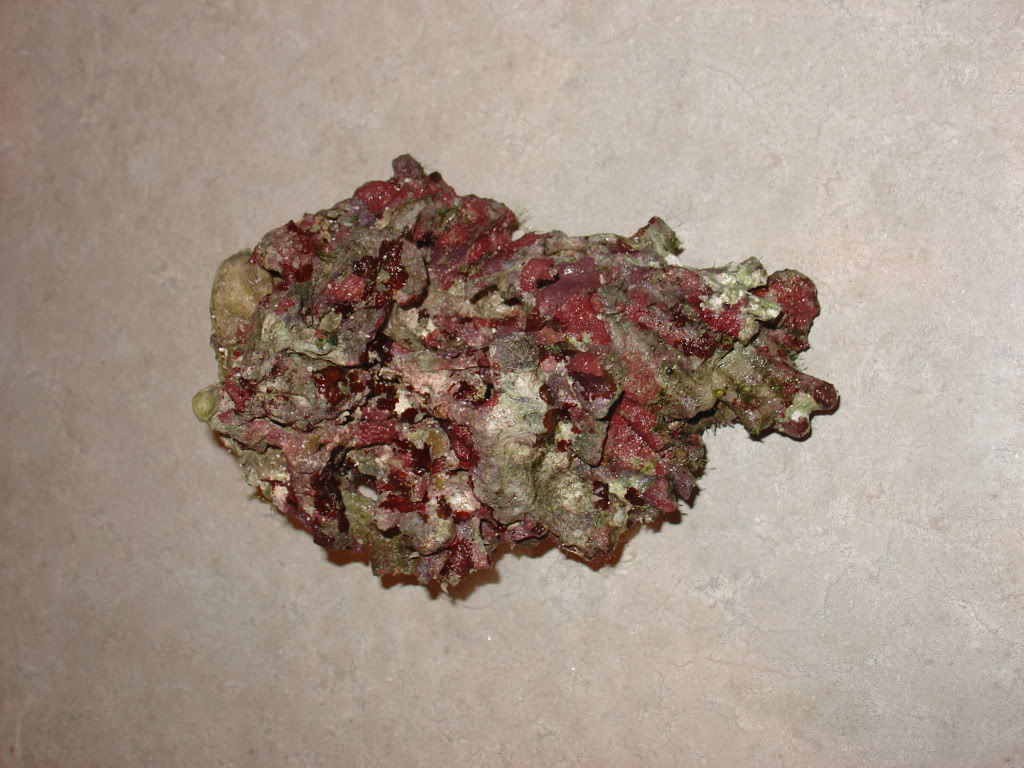
When picking out live rock, start off by looking for the same qualities as you would for dry rock. Look for rock that is very porous, almost looking like there is holes though it as well. The more porous it is the better filtration it will provide. The only difference will be the coloring. There should be at least some coralline algae on it giving it some purple / pink coloring. At the least, it should be a light brownish color. There might even be some algae on it. Try to avoid live rock that appears to be covered in algae (with almost no coralline) or appears to have a lot of hitch hikers on it. It can be extremely difficult to see hitch hikers in rock, but try your best. The below is a example of a pretty good live rock.
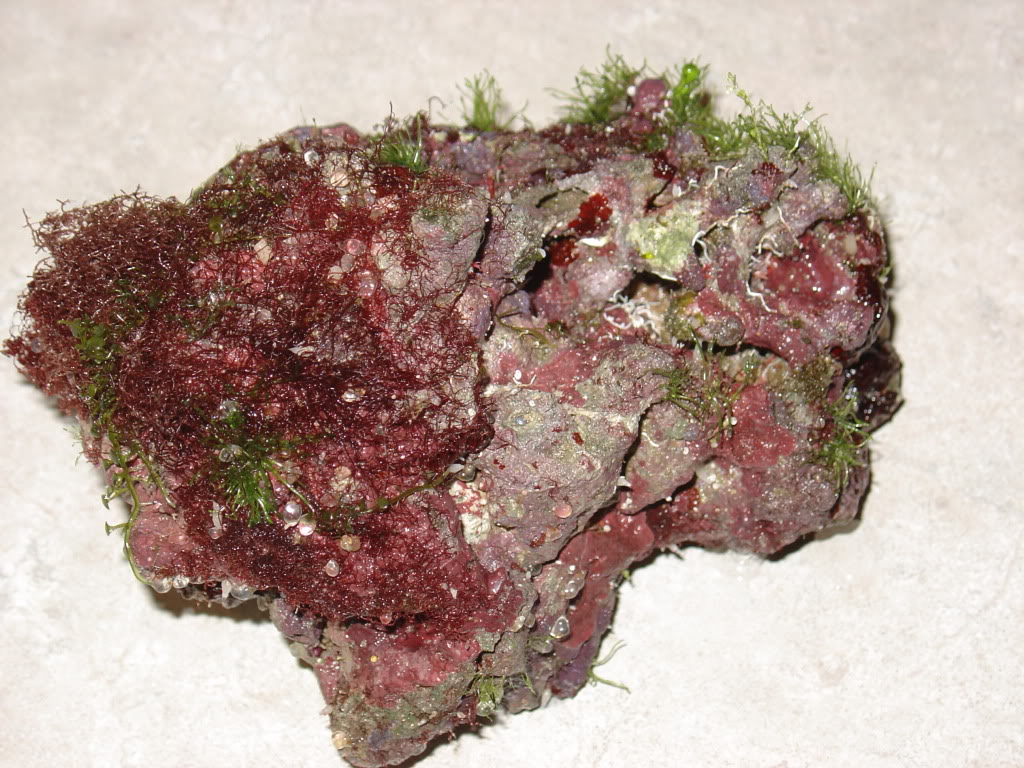
In the below pic, the rock has a lot of algae all over it potentially restricting water flow into the pores of the rock, or potentially helping along a bad algae break-out. I would certainly recommend curing this piece of live rock in a container outside of the aquarium and in complete darkness in order to ensure all the algae on it has died off before placing this rock in your main tank.
Now that we have covered some basic information about marine rocks, we can now move on the curing process. This would include both dry rock and live rock
Curing Dry (dead) Rock
It’s not always a good idea to just put dry rock into a tank right away. While you can do that without immediate harm to your set-up, it is better to cure / soak the dry rock first. Different vendors / local fish stores have different process for cleaning the dry rock before storing it to be sold, even if it gets cleaned at all. Some companies will just let the rock to dry out naturally, while others wash the rock with fresh water, and a few will scrub and wash multiple times. Depending on the quality of the rock, and the quality of the cleaning process, dry rock can leach out nitrates and phosphates (from trapped stuff in the pores of the rock) and potentially other trace elements that can lead to less than ideal water quality. Curing dry rock can help you avoid causing some water quality problems.
I follow the below guidelines when curing dry rock. Depending on the condition of the rock, the process can take 1 to 5 weeks.
A) I use dechlorinated tap water for soaking the dry rock, no salt. But if your tap water contains nitrates or phosphates, then I would suggest using reverse osmosis (RO) water. Using RO water with 0 ppm of total dissolved solids (TDS) would be the best option.
B) I fill a container that is safe for holding aquarium water. I personally prefer to use my quarantine tank or a 35 gallon container that I have purchased just for this.
C) After adding the rock and water, I will also add a power head to the container to get water movement around the rock. No need for a heater as there is no bacteria on the rock to save.
D) After the rock has been soaking for two or three days, I will use a fresh water test kit to check the nitrate and phosphate levels every second day.
E) If I find any nitrates or phosphates in the water, I will change all of the water in the container.
F) I will continue this process until the nitrates and phosphates are not detachable by my test kit for at least 4 days in a row. Once that has happened, I can now add this soaked (cured) dry rock to my aquarium at any time without risk.
I have personally used this process and it works. After about a week, the nitrate was somewhere around 5 ppm and there was a phosphate reading (I forgot the exact amount though). Three weeks and a few waterchanges later, I had 0ppm of both consistently over a few days. This was a small part of the reason why I got almost no algae in my tank during and after the cycle and 5 months later. My tank went right to growing coralline algae.
This process would be even more important for rock that was once kept in someone’s aquarium. The reason being is that rock from the ocean is very porous and will act like a sponge when kept in water that has higher levels of nitrates or phosphates, soaking up these elements into the rock. When the rock is later placed in water that has low nitrates and phosphates, it will start to leach out these elements back into the water. This is not a fast process; curing rock will take some patents at times.
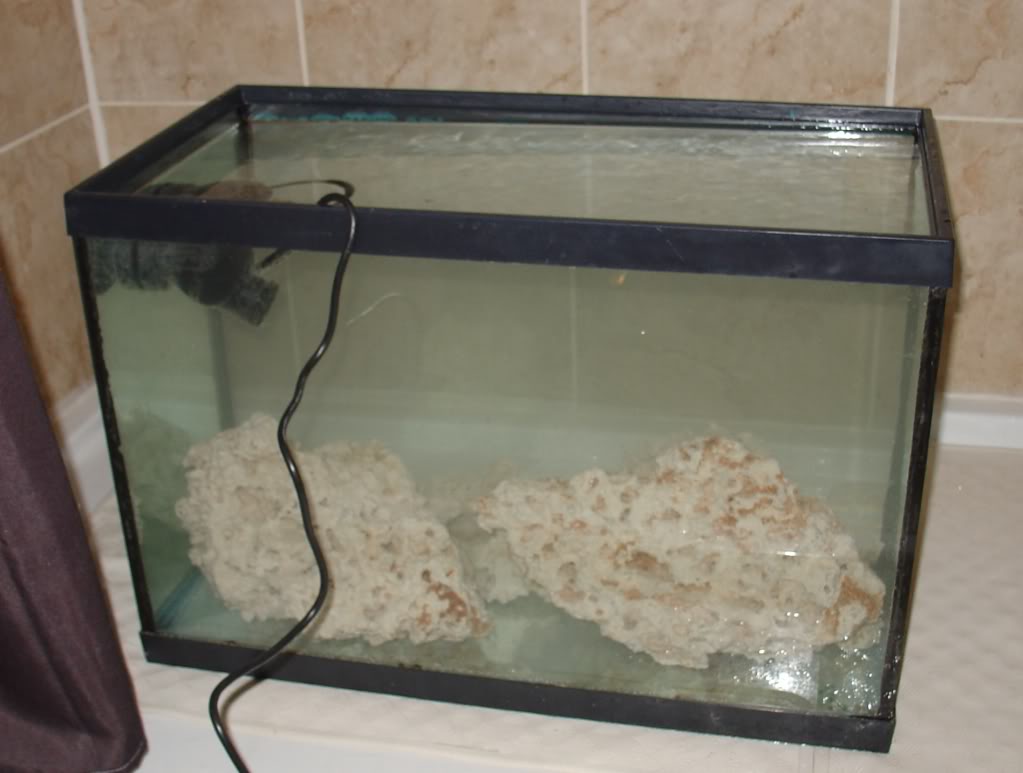
Just a few pics of how I had cured my dry and live rock. I used my 20 gallon QT for this. I had the power head plugged into a GFI plug to ensure electrical safety. You could also use a HOB filter without any media to get water movement.
Before you continue reading about curing different types of live rock, it would be helpful if you had a basic understanding of the nitrogen cycle and the process of cycling a marine aquarium. The reason why I would suggest this is due to the fact that one of the many functions live rock will perform in your aquarium is biological filtration. If you think of live rock in the same way that you think of biological filter media, the process of curing live rock my make more sense to you. Some people actually use the terms curing live rock and cycling live rock, and even cycling a tank interchangeably.
Curing Live Rock
You will typically run into two different situations here, liver rock just harvested from the ocean, and live rock that has come from a store or second hand from another hobbyist, The term un-cured live rock is used to describe live rock that is relatively freshly harvested from the ocean and filled with all types of life forms, including beneficial bacteria. During the process of collecting it from the ocean and shipping it to the store, or to you, there will be a large die-off giving you a good amount of “dead stuff” attached to your rock which will start to decompose and release ammonia. The curing process basically allows this die-off to take place naturally without killing off the beneficial bacteria on the rock for filtration. The bacteria on the rock will consuming the ammonia and continue to grow. There are a lot of similarities to curing live rock and the cycling process in a fresh water tank. Once cured, your live rock will serve as biological filtration in your marine tank. The only difference between uncured live rock just harvested from the ocean, and live rock you would get from a store or second hand from a hobbyist is that uncured live rock from the ocean will have a lot more die-off. The below link contains information about cycling a marine aquarium.
https://www.reefaquarium.com/2012/the-nitrogen-cycle/
Below are the guidelines that I have found to be very helpful:
A) I fill a large container with freshly mixed salt water with normal salinity (1.025 to 1.026 specific gravity) and nitrates and phosphates that are not detachable by my test kits. I personally prefer to use my quarantine tank or a 35 gallon container that I have purchased just for this.
B) I will then add my live rock to this container in such a way that will still allow for good water circulation around the rocks. You also have to ensure the rock is low enough in the container to allow for larger water changes without have the rock exposed to the air.
C) I will then add at least one power head for water circulation (multiple powers heads would be best).
D) I also add a heater to the container and maintain the temp around 79 to 80F. You have to be very careful when using a heater in a plastic container as the heater could melt through the container if it is allowed to make contact with the sides of the container. If there is a lot of algae on the rocks that I am curing, I will set the temp to around 80 to 82F to help speed up the die-off without killing off all the bacteria.
E) I will also keep this container with the rock in complete darkness. This is very important to kill off any algaes that will be on the rocks along with potentially harmful hitch hikers.
F) Sometimes I will place a lid on the container to make sure the rock inside is in complete darkness. If I do that, I will run a air line from a bubbler into the water to maintain higher oxygen levels.
G) After 2 or 3 days I will start to check the ammonia, nitrites, and nitrates daily with a good quality marine test kit, just as you would for the cycling process. You are basically cycling your live rock during this process.
H) If the ammonia gets above 1 ppm, I will complete a water change to lower to 1ppm or lower. This will help to keep the process moving along nicely.
I) Once your ammonia and nitrite readings are 0ppm and your nitrates are starting to decrease, your rock is cured. If your nitrate and phosphate level are low, then the rock is ready to be added to your tank. I prefer to keep my live rock curing until the nitrates are less than 2 ppm (1ppm being the best)
J) If your nitrate and phosphate levels are high, complete a water change to lower then within the normal range and continue the curing process until there are no longer any nitrates or phosphate and those levels remain stable for 3 or 4 days.
K) As a very good option, you can also use a skimmer on the container you are using to cure your live rock to help speed up the overall process. As I typically use the rubber trash can to cure my rock, I just find it too difficult to modify one of my spare skimmers to work on the container so I prefer to do a few extra water changes instead.
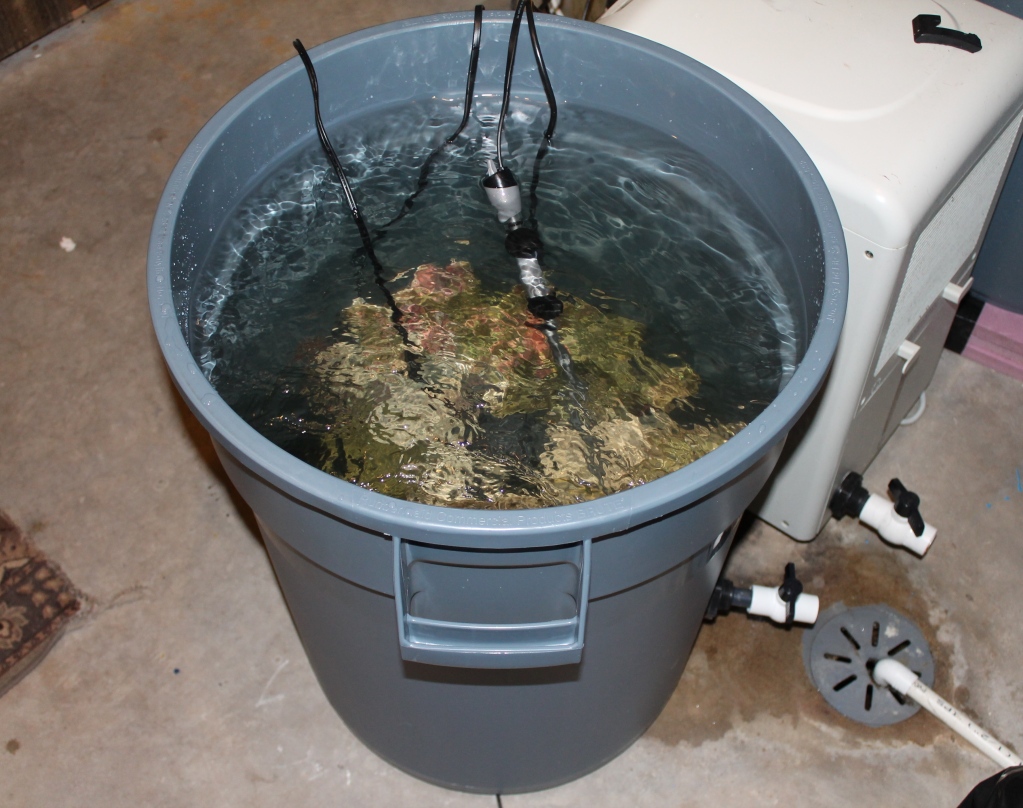
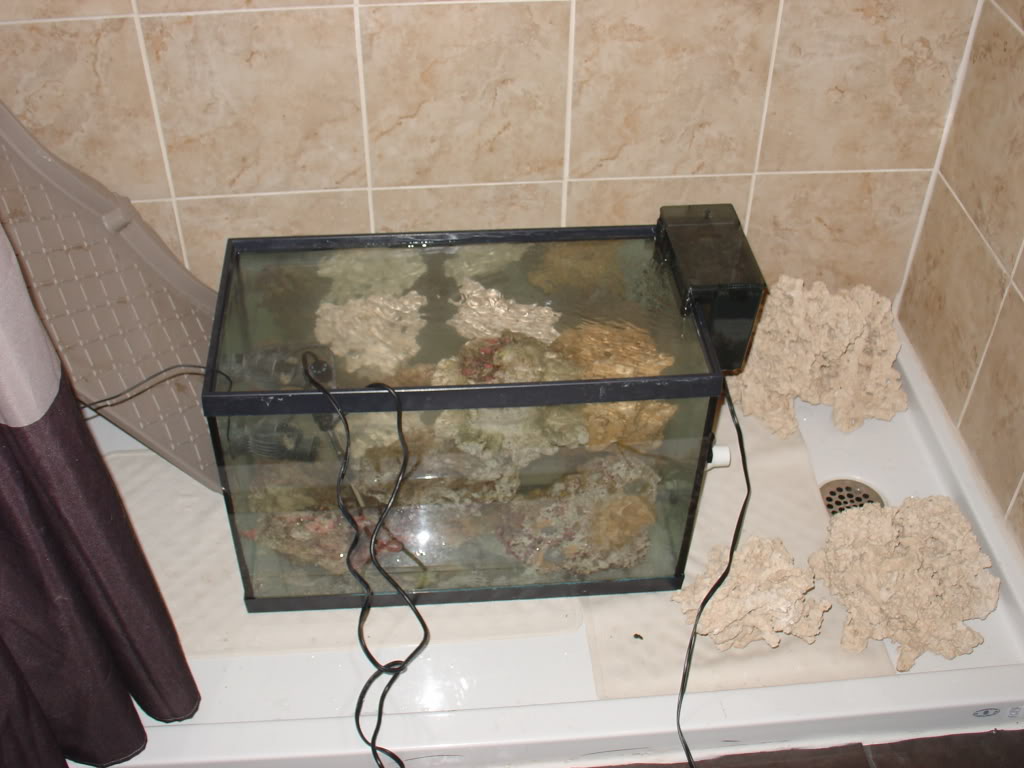
The below picture is how I like to cure live rock. The rock in the below picture was used in my 180 gallon reef tank. I use a 35 gallon rubber-maid container that has never been used for anything but aquarium water and curing live rock. I have 3 power heads, a heater, and an air line. As this container is kept in our basement utility room (which has not window) I can keep this rock in complete darkness by keeping the door closed and the lights turned off.
When I only have a small amount of live rock to cure, and my QT tank is empty, I will sometime use it to cure rock as well.
Some other important information and tips to keep in mind
While you can cure live rock in a newly set-up aquarium that doesn’t have any fish or corals in it yet, I always prefer to curing live rock outside of my aquarium as there will be a fair amount of detritus resulting from the die off. You don’t want that in your tank as it can get in your substrate making it really hard to clean it out. Why would you want this extra work if it is possible to avoid it? This is why (IMO) it is best to cure your live rock outside of your tank if you can. If you are curing your live rock in your aquarium, follow the same process. Just make sure to clean as much of the detritus out of your substrate and watch for any hitch hikers that might have survived. Do not cure live rock in a set-up tank with fish and/or corals in it. The resulting ammonia spick would be very harmful and most likely fatal to them
As soon as the rock is exposed to air, you will start to get some die off of bacteria. Just make sure you transfer the rock into your tank fully submerged in salt water and limit anytime the rock is out of the water so there is no noticeable die-off. Longer exposures to the air will produce a larger amount of die off and higher levels of ammonia. That is why I would suggest you always treat any newly purchased live rock as it was un-cured.
Sometimes when you buy live rock from a store or second hand from another hobbyist, and you are careful to transport it in tank water, you may not get much of a die off at all. If you don’t get a nitrite or ammonia reading after 1 or 2 days, the rock(s) should be safe to add to your existing tank, or if you get a small reading of ammonia (less than 0.5ppm), leave in the container until the ammonia and nitrites reach 0. Once the levels are both 0 after 1 or 2 days, you can add it to your tank. I’ve had this whole process only last a few days for my in the past when buying live rock from another hobbyist.
If you have any questions about anything else in this article, feel free to go to our forum and post your question using the below link. If you are not already a member, it will only take seconds to sign up.
http://www.aquaticcommunity.com/aquariumforum/
Some References:
http://www.livestockusa.org/CURING.html
http://successfulreefkeeping.com/learn/curing-live-rock/
Excellent article Cliff!
I have algea on some live rocks and I wish to know I can scrubb it off, cause I have some corals on the rock also, and I don’t want to loos it. Is algea and polips and zeeneas on some of them, mixed with the nasty and ugly looking algea. Please, I need to know!!
You can pick off most algaes by hand. I would not “scrub” the rocks, just manually remove the algae.
Do you know what type of algae you have ? Do you know your current water parameters ? also, what type of lighting do you have (wattage and color temp please)
I am pretty new to this amazing hobby. I’m going to soon be setting up a 90 gallon display/ 30 gallon sump (within the next month) I really appreciate your detailed instructions on the curing process, but do have a question. I just received my package of 100 lbs. worth of key largo dry rock from marcorocks.com so I will be doing the dry rock curing you described. I was also planning on buying a few pieces of live rock to seed the dry rock after curing that as well. My question is, does this curing of both of the types of rocks also serve as the cycling? Doing the curing is rising and dropping the ammonia/nitrites as in the cycling process correct? So after the curing proccess, adding these rocks to my saltwater filled tank, that cycling proccess should basically already be done?
When curing dry rock, you are basically soaking it get any nutrients out of it so you won’t have to deal with that in your display tank. When you are curing live rock, you are cycling it, same thing as cycling a fresh water tank with fully seeded filter media.
I would suggest you first cure your dry rock, then add it to your display tank. Then I would suggest adding your live rock to the tank and allowing it to cure which will also seed the dry rock with some beneficial bacteria. This basically is the cycling process when using both live and dry rock. The below link explains in the cycling process in a little more detail
Once you have gone through this, you will see how easy it can be
https://www.reefaquarium.com/2012/cycling-a-marine-aquarium/
This is where I want to really make sure what is best. The link you sent still says to cure the live rock outside of the tank before adding it to the tank. It seems the benefits of this is to rid of any pests etc. but through the curing process all of the ammonia/nitrite levels will be regulated before even adding to the tank if curing outside. Will I have to add pure ammonia to the tank then and cycle everything in the tank as well? Or should i not really concern myself too much with the pests, just rinse and add to tank? It also mentions at least adding 20% worth of live rock if mixing with dry rock. I originally was hoping to only add maybe 2-3 pieces? Thank you again for your time, I really want to get the cycling proccess right, as I understand hoe important this stage is! Thank you
There are a few different approaches you can take. In your particular situation with using lower amounts of live rock, I feel the best approach would be to cure/cycle the live rock in your display tank with your already cured dry rock.
Make sure you cure your dry rock in a different container. Keeping the lights off when curing/cycling the live rock will help you get rid of the of nasty hitch hikers no matter if it is done in your tank or another container. Just add your substrate last, after the cycling process has been completed and you have cleaned out any crud that could have fallen of the live rocks as a part of the die-off.
I do not believe you will need to add any ammonia during this process. Your tank should cycle just fine.
Just make sure you stock your tank very very slowly as you are starting off with low amounts of live rock. You must leave enough time for the bacteria growth to keep pace with the new stocking leaves
I really appreciate your advice, definitely getting excited to get this up and going since I have all of my equipment, just doing these final researches and planning before jumping into it, so thanks again
I’m only glad to help Jason
Keep me up-dated on your progress and let me know if I can help any further
If I added the sand before putting all of the rocks in there and letting the cycling process take place Wouldn’t certain inverts take care of some of the crud? I only ask because I feel a little skeptical of putting the weight of all of the rock directly on the glass without having any substrate between the two. I was looking at getting a cleaner pack anyway from liveaquaria.com as my first tank inhabitants before adding fish. I was basically looking at cycling the tank with lights off as you suggested, then after cycling, running for some time with lights on to provide the inverts with algae and such for a food source, monitoring everything for some time, then slowly beginning adding fish/corals. Is the crud from live rock something that the cleaner pack could take of or do they not even mess with that crud?
You want the rocks sitting directly on the glass. Otherwise, your inverts and fish will move the sand around over time making the rocks unstable and potentially falling over in the tank. I would not think placing the rocks directly on the glass would not cause any problems. That how I have about 250 lbs of rock sitting in my 180 gallon tank. If you are concerned, you can place egg-crate on the glass and set you rocks on that. That will help spread out the weight over a larger area. Your rocks certainly need to be sitting on a very stable base before placing the substrate in the tank. You can fix this by moving the substrate out of the way, resetting your rocks in the tank followed by moving the sand back around the rocks again
I would suggest you clean out that initial buildup of crud from the rocks. The reason being is that new tank are more at risk of nasty algae out breaks than more mature ones. You want to avoid as much of nitrate producing crud as possible. Leaving it in the tank (wither or not a CUV eats it) will still result in more nitrates being added to your set-up. New tanks typically have less capabilities to process these nitrates as compared to more mature set-ups. Clean this out will remove that food source for them allowing your CUC to focus on any algae that will/can start growing on your rocks. You can also achieve this by a very very light gravel vac. Just enough to such up the crud, but not enough to move around the substrate.
great read thanks buddy, just a quick question, new tank set up, if i get my live rock straight from the pet store in my water tubs and dont let the air get to it,(i keep it in water while transporting)then place it straight in to my tank, will this help and speed up the cycle,(being there very min if at all ,any die off)and some one said to me to dip my rocks in a detol solution this will get rid off hitchickers,?
Yes, keeping your rock in water while taking it home would most likely shorten you cycle to a matter of a few days. Your test results will confirm that for you
I would not dip the live rocks in anything that would kill off hitch hikers. If that dip will kill of hitch hikers then it would also affect fish, inverts, and corals. As live rock is pouris, you run the risk of the dip being absorbed into the rocks and being released into your tank latter on. I personally would not risk it.
If you want to get rid of hitch hikers, I would suggest a 3 month cure in complete darkness. That has always worked very well for me
I have a new 75 gallon saltwater tank setup going with just RO water, salt, heater, Octo pus BH-1000 skimmer and Fluval 406 filter running for approx. 30 days now. I have not addded any fish and rocks yet. 3 weeks ago I checked the levels and everything was 0. My water is looking very cloudy for the past week so just to ease my mind checked levels again last night and now my ammonia is 2.0, PH 8.2, Nitrite 0.50 and nitrate.10. How can I have ammonia, ect with no fish, rocks or anything, just water? Please help because I was going to add my rocks and live sand this week. Can these readings be right? I have the ATI saltwater test kit. Thanks, Bob.
The first step would be to verify you are in fact getting accurate readings from your test kits
If you have ammonia, then it is coming from somewhere. Most likely from some type of decomposing organic matter.
What else is in the tank ?
How have you been toping up for evaporation ?
Can you post a picture of the set-up ?
Hey Cliff,
Firstly want to say love your work, its always good reading blogs that have both sides of the coin when discussing the options out there.
I have a question regarding the end of cycling process with the live rock. You mention to limit exposure to air this is when the die off occurs.
I guess with my experiences using live rock i always find its easier to aquascape when the rock is dry, it also allows to use silicones / adhesives plus the various other scaping tools. Which brings me to my question using your method how would we complete our aquascaping to ensure that it a) aesthetically pleasing and b) suitable for all inhabitants, by not likely to topple over.
Your thoughts on this would be great.
Thanks
I was making reference to live rock when stating not to expose it to air. You are referring to dry or dead rock when you set-up your rocks. That is two completely different situations to be in
Silicone will not work to well to hold dry rock together. I have found product like the below to work a lot better
http://www.bluezooaquatics.com/productdetailas.asp?did=5&pid=4437&cid=356
Hi Cliff,
Awesome blog you got going here, been binge reading the last month. hahahha
Now that i am at that step where i have my own tank & rock, i read that curing dry rock is recommended. Few Questions if you don’t mind. (take into mind, my dry rock i got from a fellow reefer & has been lying outside exposed to natural elements)
a) Can i CLEAN the rock using just RO water & flow in a dark drum (Im not really concerned about building up bacteria as i will start the natural cycle after the rock has been cleaned)
b) Do i need to put a heater in the RO water?
c) I don’t want to clean in salter water as I still want to aquascape after i clean the rocks & it will be outside the water for a day or two while getting the rock setup right.
d) If you don’t like the method im asking about, what would you recommend i do or approach the process of cleaning the dirt of my rock.
* Dirt – dead algae, spiders, sand, mud, dead coral.
Very noob to the reefing scene, sorry.
Appreciate your input.
Thank
Martin
I will try to answere all of your questions
Yes you can cure dry rock in fresh water. Clean off the stuff on the rock before putting it in the water. No heater required, but you will need good flow. Test the water with a fresh water nitrate test kit every few days. If you get a reading, change the water and keep repeating until no nitrates are found. When you have done that, take your time arranging things the way you want
However, keep in mind you will still have to cycle your tank before stocking it
Hi Cliff, Very nice article. I know it is old but hope you still are on duty and can help me.
What if I have a mature tank but I need to add more dry rock to help better with the biological filtration? I bought around 1 pound of dry rock and would like to add it directly to the display tank. Any recomendation? Thanks
Soak the rock in dechlorinated fresh water for a few days/weeks. Make sure you can leach out any trapped nitrates or phosphates before adding to your set up
I live near the sea..can I just get fresh live rocks and put it automatically in my aquarium? +o no need to cure or clean?
I would suggest curling them first, just to be safe
Once my rock is cured how long do i have to aquascape if I am wanting to ‘glue’ some of the pieces together?
If you take it our of the water, you have a few minutes before you start getting a lot of die-off
Hi Cliff couple of questions for the dry rock cure.
Is there a reason you use fresh as opposed to salt water, and can you use the latter?
How often are you doing water changes and when and how much?
Great post, as clear as I’ve seen. Just got rock thats been sitting out from someone, have it circulating in a mix of my tank water and fresh rodi saltwater. Been a day and theres a little stench if you get up close.
I like using fresh water as it is less saturated with minerals. This helps to leach out nitrates and/or phosphates from the rock a lot quicker and you avoid the extra expense of salt when it is not needed for dry rock. If you water has less than 100 PPM of TDS, then you should be OK
i like changing the water as soon as I start seeing either nitrates or phosphates in the water. You just have to make sure the fresh water you are using has next to no nitrates or phosphates in it.